Why You Should Be Cleaning Your Makeup Brushes
Makeup brush cleaning is an essential part of your beauty routine and hygiene. Cleaning your makeup brushes regularly is super important for clean skin and a flawless makeup application. If you don’t care for your beauty tools, they won’t last as long as they should. Dirty brushes are a breeding ground for bacteria. Even if you can’t see with your naked eye, invisible germ particles get trapped in the bristles. Built-up makeup, product residue, dead skin cells, dirt and dust are also present. All this bacteria can clog pores leading to irritation, acne breakouts, even infection.
How often should you clean your makeup brushes?
It’s important to keep your brushes germ free! A thorough cleaning weekly to biweekly will keep them in tip top shape. However, if you suffer from regular breakouts or have an eye infection you must clean your brushes every day. Bacteria prefers wet conditions. So, if you use tools such as a foundation brush or beauty blender to apply liquid textures, I recommend cleaning these at least two to three times a week.
Take care of the brush handles as you don’t want to wet the wooden part of the brush, but make sure you are cleaning that area as well. Use 70% Isopropyl Rubbing Alcohol for a good wipe down. I personally keep rubbing alcohol in a spray bottle for easy use. And I especially love the fresh smelling winter green version.
Without question there are many fancy brush cleansing solutions on the market, but I believe an economical mild antibacterial pump soap works best.
How do you actually clean your makeup brushes?
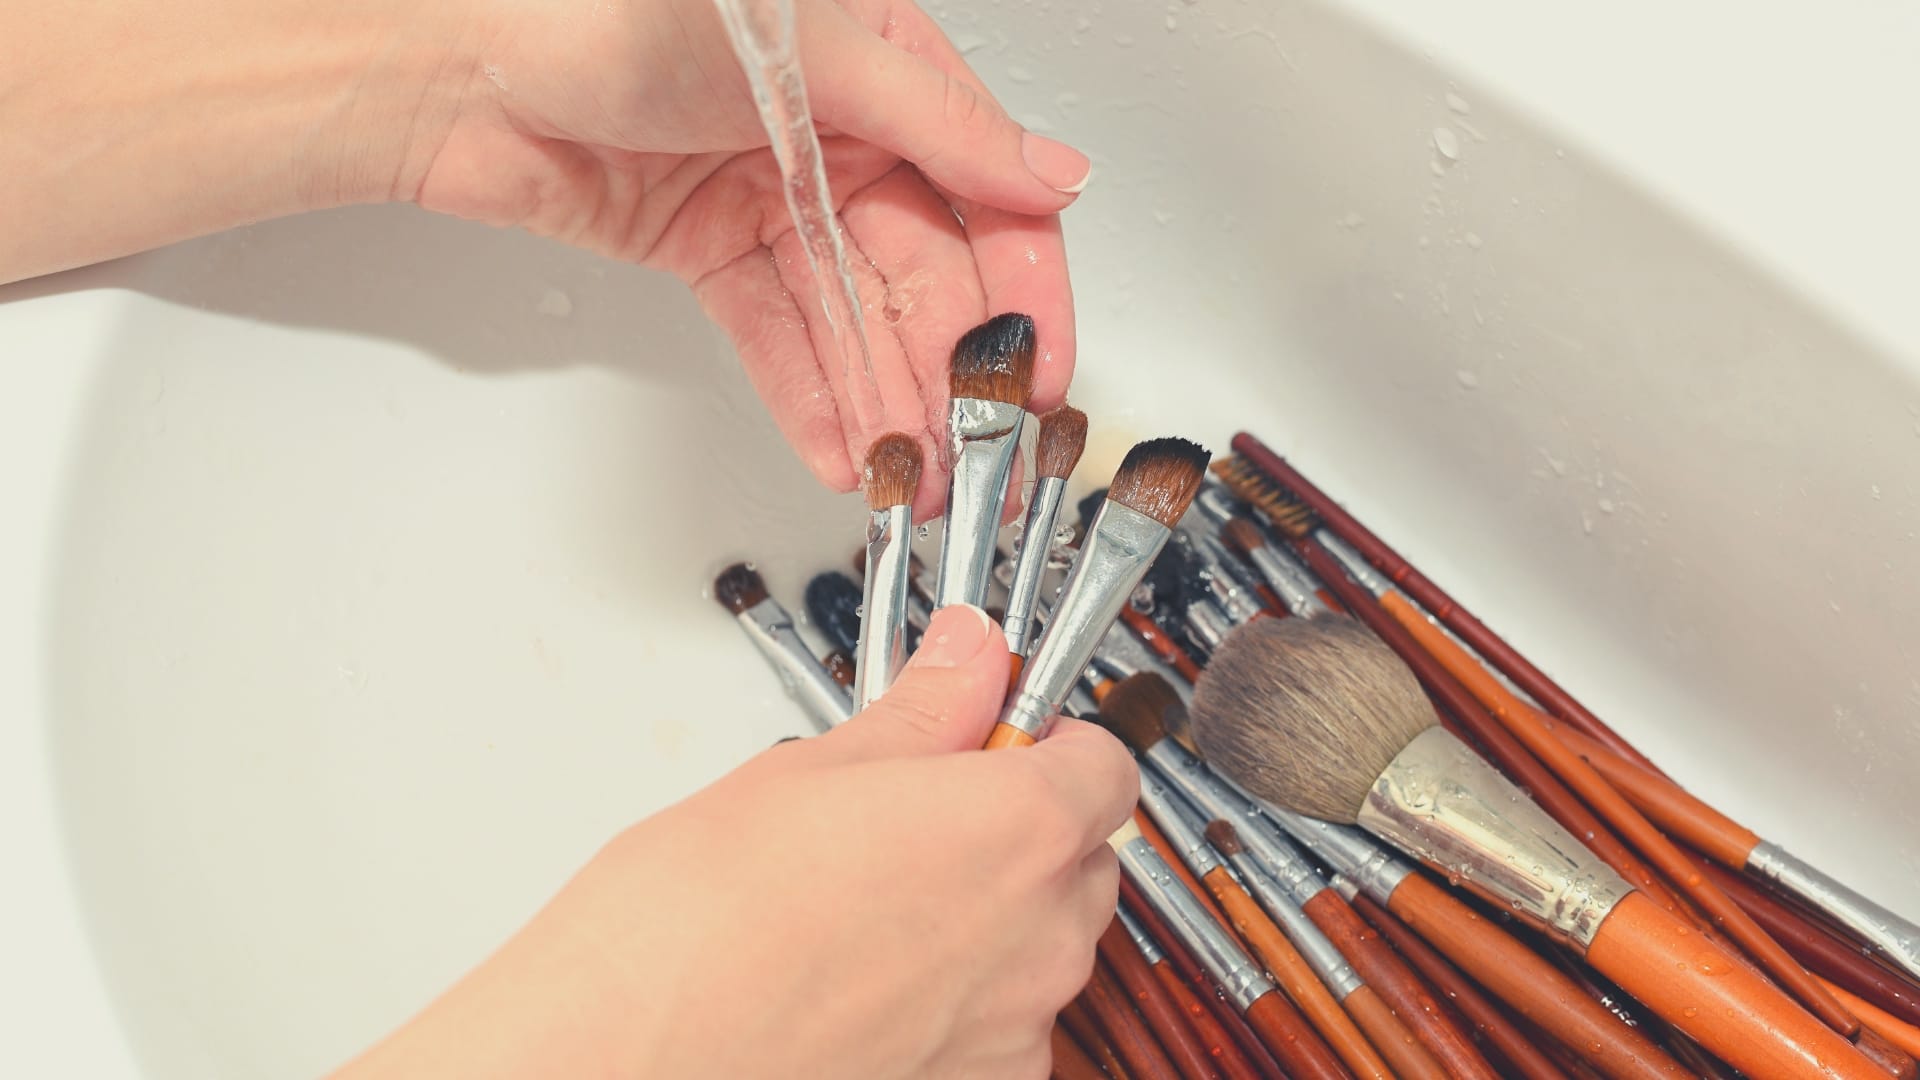
To clean your makeup brushes, I recommend the following step-by-step guide:
Step 1
Wet the brush under lukewarm water using your fingers to separate the bristles to rinse out all of the residual makeup.
STEP 2
Next, apply 1 pump of a mild antibacterial soap onto the brush. Use your fingertips to gently massage in the soap working up a light lather while rinsing under warm running water. Repeat this process until the water runs clear from your brush bristles.
Step 3
Make sure soap is rinsed thoroughly while gently pressing on the bristles with your fingers to remove any excess water.
Step 4
Gently dry brushes with a soft towel. Then press the bristles between your fingers to reshape the brush hairs back to its original shape.
Step 5
Lay your brushes flat on a clean towel or hanging over the edge of a table to air-dry. Do not dry your brushes upright, the moisture will breakdown the adhesive that connects the brush head to the handle.
Do not share your brushes! It spreads bacteria and can cause eye infections.